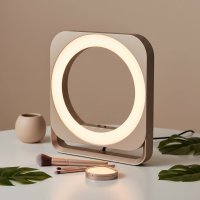
If you’ve ever wondered how content creators and photographers achieve that perfectly even, flattering glow with captivating circular catchlights in their subjects’ eyes, the answer is often a ring light. The ring light portrait has become a staple in modern photography, prized for its ability to produce soft, shadowless illumination that flatters every face. But moving from a simple selfie to a professional-looking portrait requires more than just pointing the light and shooting. As a professional with over a decade of experience, I’m here to guide you through everything you need to know to master this essential piece of gear.
This comprehensive guide will walk you through selecting the right light, mastering different setups, and avoiding common mistakes. Whether you’re a budding photographer, a vlogger, or a makeup artist, you’ll learn how to harness the power of a ring light to create stunning portraits that stand out. For see our ring lights recommendations on this site.
Why Use a Ring Light for Portraits?
A ring light isn’t just a trend; it’s a tool designed to solve specific lighting challenges in portraiture. Its unique circular shape creates a beautiful, even light that wraps around the subject’s face, minimizing skin imperfections and eliminating harsh shadows. This quality is often described as “beauty lighting” for a reason.
The most iconic feature of a ring light portrait is the distinct circular catchlight it creates in the subject’s eyes. This effect adds a spark of life and a professional polish that is difficult to replicate with other lighting setups. The light emanates from all directions around the lens, creating a soft, uniform look that is incredibly forgiving and flattering.
Key Benefits of Ring Light Photography:
- Shadowless Illumination: The light source surrounds the camera lens, casting an even glow that minimizes wrinkles and blemishes.
- Flattering Catchlights: Creates attractive, circular reflections in the eyes that draw the viewer in.
- Even Skin Tones: The soft light helps to produce smooth and consistent skin tones.
- Versatility: It can be used as a key light (main light), a fill light to soften shadows, or even for creative effects.
Choosing the Perfect Ring Light for Your Portraits
Not all ring lights are created equal. To achieve a professional-grade ring light portrait, you need to select a light with the right features for your specific needs. Size, power, and color accuracy are the three most critical factors to consider.
Size Matters: From 10-inch to 20-inch and Beyond
The size of the ring light directly impacts the softness of the light it produces. A larger ring light will create a softer, more diffused light that wraps around your subject more effectively, which is ideal for headshots and upper-body portraits.
- 10-12 inch Ring Lights: These are best for close-up work like makeup tutorials or head-and-shoulders vlogging. They are portable but may produce harsher light for full-body shots.
- 18-20 inch Ring Lights: This is the sweet spot for serious portrait photography. An 18-inch ring light is large enough to provide soft, flattering light for single-subject portraits and is powerful enough to be a primary light source.
Color Temperature Control is Non-Negotiable
|
Our Picks for the Best Ring Light in 2026
As an Amazon Associate I earn from qualifying purchases.
|
||
| Num | Product | Action |
|---|---|---|
| 1 | 10\" Selfie Ring Light with 73\" Tripod Stand & 1 Phone Holder, LED Camera Ringlight with 48 RGB Colors Modes & Musical Rhythm Mode and 12 Brightness Dimmable for TikTok/Makeup/Photography/Vlog |

|
| 2 | Weilisi 10\" Ring Light with Stand 72\'\' Tall & Phone Holder,38 Color Modes Selfie Light with Tripod Stand,Stepless Dimmable/Speed LED Ring Light for iPhone & Android,YouTube, Makeup,TIK Tok |
|
| 3 | Upgraded Ring Light for Laptop, Monitor, Desk & Phone – Eye-Caring LED Webcam Light with Screen-Safe Clip, Adjustable Monitor Mount, 50 Lighting Modes, Computer Light for Zoom, Streaming, Video Calls |
|
| 4 | NEEWER Basics 10\" Selfie Ring Light with Tripod Stand/3 Phone Holders Compatible with iPhone/3 Cold Shoes/Remote, LED Ringlight Lighting for YouTube TikTok Vlog Video Recording Makeup Streaming, R11 |
|
| 5 | STALLY 10.2\" Ring Light with Stand, 75\" Tall Ring Light with Phone Holder and Wireless Remote, 12 Dimming Levels, 32 Color Modes Selfie Light Tripod for iPhone, Live Stream, Makeup, YouTube, TikTok |
|
| 6 | Aureday 14\'\' Selfie Ring Light with 62\'\' Tripod Stand and Phone Holder, Dimmable LED Phone Ringlight for Makeup/Video Recording/Photography, Circle Lighting for All Cell Phones&Lightweight Cameras |
|
| 7 | Weilisi 12\'\' Ring Light with Stand 72\'\' Tall & 2 Phone Holders,38 Color Modes Selfie Light with Tripod Stand, Big LED Ring Light for iPhone/Android/Camera,YouTube,Makeup |
|
| 8 | UBeesize 12\'\' Selfie Ring Light with 62’’ Tripod Stand for Video Recording, Live Streaming(YouTube, Instagram, TIK Tok), Compatible with Phones, Cameras and Webcams |
|
| 9 | Sensyne 10\'\' Ring Light with 50\'\' Extendable Tripod Stand, LED Circle Lights with Phone Holder for Live Stream/Makeup/YouTube Video/TikTok, Compatible with All Phones |
|
| 10 | EMART 10\" Ring Light with 55\" Extendable Tripod Stands and Phone Holder, Dimmable LED Circle Round Light for Selfie Camera Photography/Makeup/YouTube Video/Vlogging/Live Streaming |
|
The mood of a portrait is heavily influenced by the color of the light. A light with adjustable color temperature (bi-color) allows you to switch between warm (orangey) and cool (bluish) tones to match ambient lighting or create a specific artistic effect. Look for a ring light that offers a range from at least 3200K (warm) to 5600K (cool daylight). This flexibility saves you from having to use color-correcting gels and gives you complete creative control.
Don’t Overlook CRI (Color Rendering Index)
The Color Rendering Index (CRI) measures a light’s ability to accurately reproduce the colors of the object it illuminates. For portraits, this is crucial for capturing natural-looking skin tones. A low CRI light can make skin look dull, pale, or unnaturally tinted.
Pro Tip: Always choose a ring light with a CRI of 95 or higher. This ensures that the colors in your portrait—from skin tones to clothing to makeup—are rendered vibrantly and accurately, just as they appear in real life.
How to Set Up Your Ring Light for Stunning Portraits
Once you have the right gear, it’s time to set it up. The placement of your light, subject, and camera will dramatically change the final look of your ring light portrait.
The Classic Front-Facing Setup
This is the most common and straightforward way to use a ring light. It produces the iconic shadowless look and those perfect circular catchlights.
- Position the Light: Place the ring light directly in front of your subject, with the camera positioned in the center of the ring.
- Adjust the Height: The center of the light should be at the subject’s eye level. This ensures the most flattering angle and symmetrical catchlights.
- Set the Brightness: Start with the dimmer at 50% and adjust as needed. The goal is to illuminate the subject without overexposing their face. The light should be bright enough to eliminate shadows under the chin and nose but not so bright that it causes the subject to squint.
Experimenting with Angles for More Depth
While the front-facing setup is great, it can sometimes feel a bit flat. To add more dimension and drama to your portraits, try moving the ring light slightly off-center.
- 45-Degree Angle: Position the light slightly to the left or right of the camera. This will create soft shadows on one side of the face, defining facial features like the jawline and cheekbones. It’s a great way to add a subtle sense of depth.
- Above the Subject: Raising the light slightly above eye level can create more defined shadows under the cheekbones, a technique often used in beauty and fashion photography for a more sculpted look.
Common Ring Light Portrait Mistakes to Avoid
Getting a great ring light portrait often means knowing what not to do. Here are a few common pitfalls and how to fix them.
-
Problem: Reflections in Glasses: The ring light is notorious for causing distracting circular reflections on the lenses of glasses.
- Solution: Raise the ring light higher than the subject’s eye level and have them tilt their head down slightly. This changes the angle of reflection so the circle is no longer visible to the camera.
-
Problem: The Light is Too Harsh: Blasting your subject with full power can wash out their features and create an unnatural, deer-in-the-headlights look.
- Solution: Use the dimmer! It’s better to increase your camera’s ISO slightly than to use a light that’s too powerful. You can also move the light further away from the subject to soften its effect.
-
Problem: The Background is Too Dark: Because the ring light’s illumination falls off quickly, it can leave your background looking dark or underexposed.
- Solution: Move your subject further away from the background to create a pleasing separation, or introduce a second, less powerful light to illuminate the background independently.
Frequently Asked Questions
What is the best size ring light for portraits?
For professional-quality portraits, an 18-inch or 20-inch ring light is ideal. This size provides a soft, wrapping light that is flattering for headshots and three-quarter shots. Smaller sizes can work for very close-up shots but may be less versatile.
Can I use a ring light as my only light source for a portrait?
Yes, a ring light can absolutely serve as your sole light source, especially for clean, high-key looks. Its design provides both key and fill light from a single source. However, for more dynamic portraits, many photographers use it as a key or fill light in combination with other lights, such as a hair light or a background light.
How do I avoid the ring reflection in my subject’s eyes if I don’t want it?
If you want the benefit of the soft light without the signature catchlight, you’ll need to use the ring light off-camera. Position it to the side or above the subject, similar to how you would use a softbox. This technique provides beautiful, soft illumination without creating the tell-tale ring in their eyes.
What camera settings work best for a ring light portrait?
Start with a wide aperture (like f/1.8 to f/2.8) to create a soft, blurry background. Set your ISO to a low value (100-400) to ensure a clean, noise-free image. Adjust your shutter speed to achieve the correct exposure. Since your subject is stationary, you can use a shutter speed around 1/125s.
Elevate Your Portrait Photography
The ring light is more than just a tool for influencers; it’s a versatile and powerful asset for any portrait photographer. By understanding the fundamentals of choosing the right light, mastering your setup, and avoiding common mistakes, you can consistently create beautiful, professional-looking ring light portrait images. Remember to experiment with angles, power levels, and color temperatures to develop your unique style. Now go on and start shooting
Get our weekly buyer guide
Practical specs, not advice. Unsubscribe anytime.